Instana Agent Installation
Instana Server Information
Login into the Instana Server that has been deployed in your environment
Open a web browser and login to the Instana Server UI:
https://169.62.62.167.nip.io/#/home
Use the following credentials:
**E-Mail:** admin@instana.local

**Password:** "please refer to credentials.pdf" on the Instana server
Instana Agent Deployment Options (Review the Install UI page)
Before we start the agent installation, let's do a quick review/tour of the options available so you can familiarize yourself with the interface. Instana has a variety of agent installation options including the mirror repository and static agents that allow customers to meet strict change control processes. They can be accessed by clicking the "Deploy Agent" button as shown below in Image 1 from the Instana UI (The link you opened above):
Image 1

Some of the available options are listed below:
. OS specific installer (Linux, macOS, Windows, Unix)
. Hosted Cloud Services (AWS, Azure, Google Cloud)
. Docker (and other container managers)
. Kubernetes
. OpenShift
. Cloud Foundry and BOSH
. VMWare Tanzu
. Integrations (IBM)
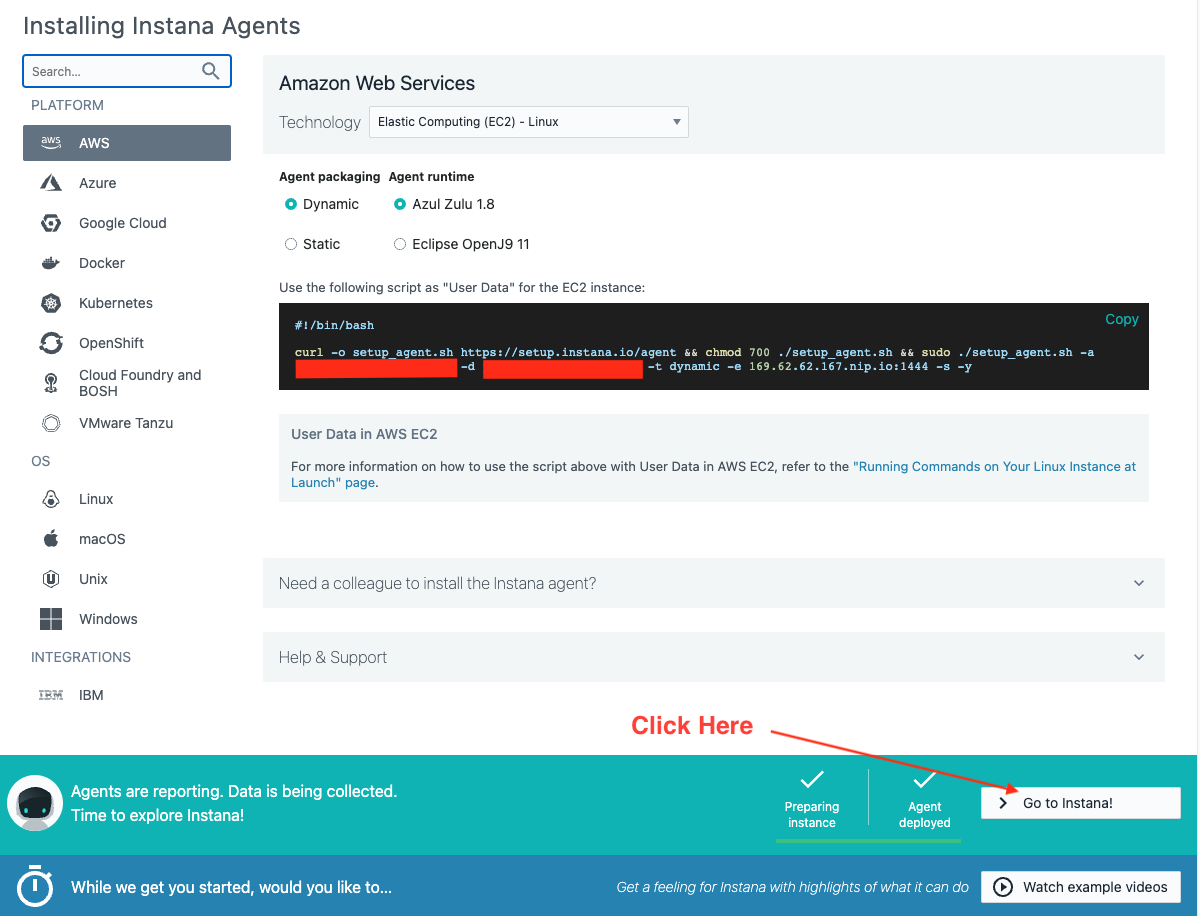
You begin by choosing the platform where you will be installing the agent. Then you can selected the Technology dropdown and choose from a list of installation options. For example, on Linux, you can choose a automatic one-liner installation, RPM, or TAR file installation. For OpenShift/kubernetes, you have multiple options including operator, helm, and yaml installs. Image 2 shows all the available agent installation options and this will be the default screen when you login the first time to the Instana UI. Just click on "Go to Instana" at the bottom of the page*
(Don't Install yet, we will be doing the actual installation in the next section, just familiarize yourself with the interface and available options)
Image 2
HINT: Instana agent install needs privileges! ROOT!!
Instana collects data from monitored systems by using a single host agent on each host. The host agent runs on your hosts to collect and aggregate data from various sensors before it sends the data to the Instana backend.
The Instana Host Agent has two types, dynamic and static, based on whether it can update itself or not. What does it mean? Here is the excerpt from Instana agent documentation.
A dynamic host agent downloads on startup the latest set of sensors from repositories. By default, a dynamic agent updates itself daily with the latest and greatest capabilities that are released. It is also possible to tightly control the updating of dynamic host agents by pinning a version.
By default, dynamic host agents use the Instana repository to pull updates, but it is possible to set up your own managed mirror. Currently, the mirror must be a Nexus repository. This is probably the best option for must customers because it allows them the benefits of automatic updates, while at the same time controlling the content that is in the repository.
A static host agent is a self-contained host agent that includes all the latest available components at the time of its release, and has no dynamic update capabilities. The static host agent has a stable "bill of materials" that never changes after the host agent's installation.
TIP: Static host agents require no internet connection to the Instana repository, and are recommended in restrictive network setups.
Let's move on and get some actual work done.
Install Agent(s)
1: Installing Instana Agent on Linux VM (s)
In this section of the lab, you will be installing the Instana Agent on 2 Linux vm's that have been provisioned for you for this lab:
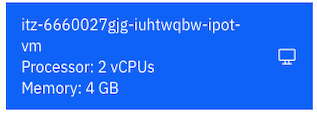
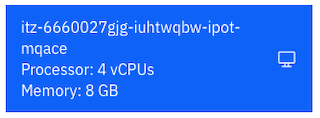
IP: 169.62.62.165 - itz-#####-ipot-vm
IP: 169.62.62.188 - itz-#####-ipot-mqace
Replace the ###### with the name from the environment that was provisioned for you as shown below in Image 3.
Image 3
The steps below show the installation on the itz-#####-ipot-vm server. (Repeat these steps on the itz-#####-ipot-mqace server as well)
Open up a terminal window on your bastion vm and login to the vm as shown below:
ssh -p <port_number> user_name@ip_address
ssh -p 2022 cocuser@169.62.62.165
Use the following credentials:
**user:** cocuser

**password:** "please refer to credentials.pdf" on the Instana server
Then use sudo to switch to root:
sudo -i
Switch back to Instana UI, select the "Stan" the robot icon in the upper left corner as shown below in Image 4
Image 4

Next, click the "Deploy Agent" button near the upper right corner as shown below in Image 5
Image 5
A window will open with a list of different environments where you can install the Instana Agent.
This is a Linux server, so select Linux on the left side of the screen and select the options in the order (1 to 7) as highlighted below in Image 6
Image 6

When you pull down the "Technology" dropdown you will notice that you can install the Instana agent in several ways such as perform rpm installs or simply download a tar file. The method we are using in this lab is "Automatic Installation (One-Liner)".
Next, copy and paste the curl command into the terminal window you had opened for the itz-#####-ipot-vm server.
The install will progress and you will see an output similar to the screen capture shown below in Image 7
Image 7
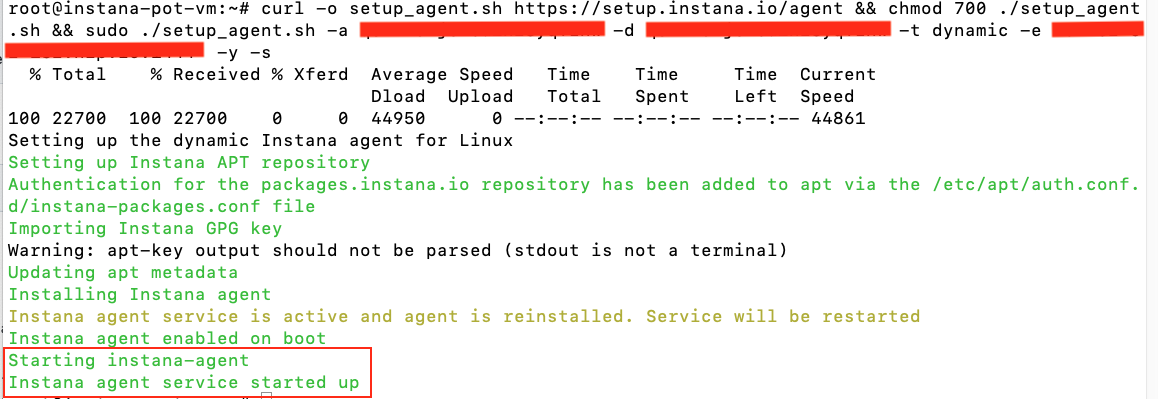
At this point, the Linux Agent is installed and up and running on the following itz-#####-ipot-vm server (169.62.62.165).
The Agent will automatically start monitoring the operating system and start discovering key processes and middleware. In many cases it will automatically instrument those technologies.
Update configuration.yaml file on server
Next, we need to edit the configuration.yaml and assign this VM to a Zone so it is grouped correctly in Instana:
cd /opt/instana/agent/etc/instana
vi configuration.yaml
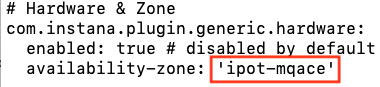
In the configuraiton.yaml file, search for Zone and update the file. Remove the "#" sign and update the availability-zone variable as shown below in Image 8.
Image 8
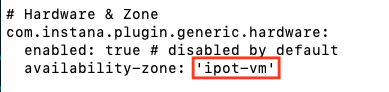
Save the file
Repeat the above step on the itz-#####-ipot-mqace server and put the value of 'ipot-mqace' in the availability-zone variable in the configuration.yaml file when you install on that server
Next, let's validate the agent is installed, Open a web browser and login to the Instana Server UI:
https://169.62.62.167.nip.io/#/home
Use the following credentials:
**E-Mail:** admin@instana.local

**Password:** "please refer to credentials.pdf" on the Instana server
In Instana UI, select the "Stan" the robot icon in the upper left corner as shown below in Image 9
Image 9
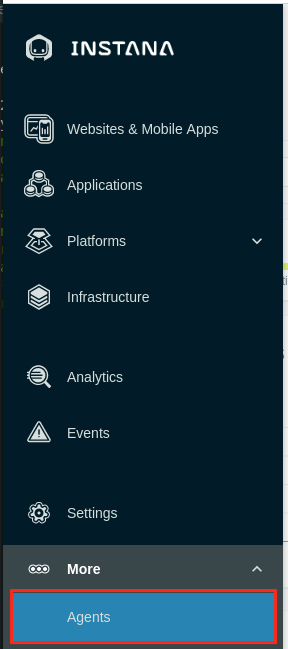
To view the installed Agent, from Instana UI, under the three dots on the left hand menu, select Agents page as shown below in Image 10
Image 10
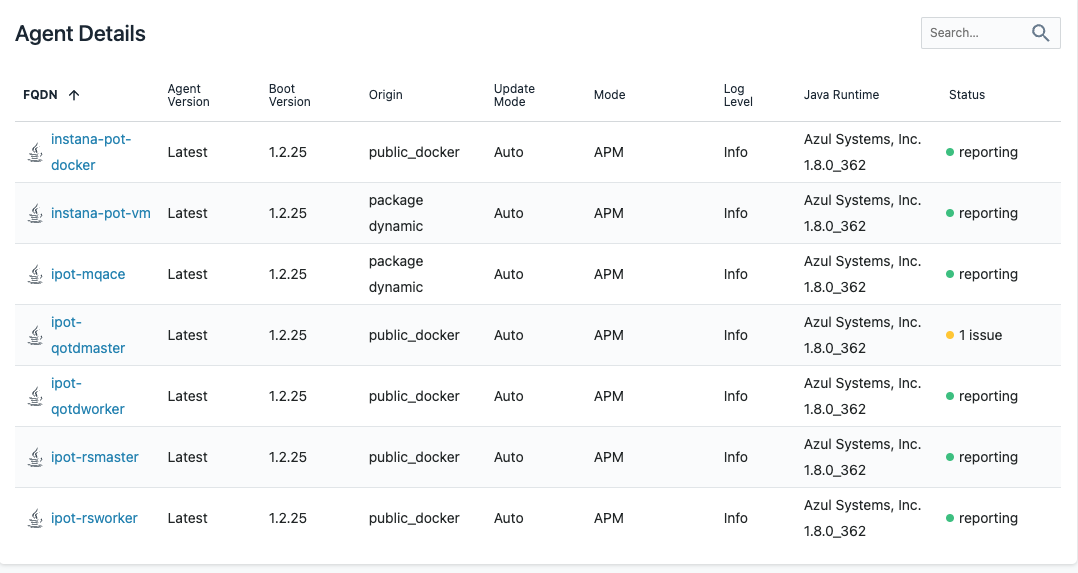
On the Agents page, you will see the deployed agent information in the Agent Details section as shown below in Image 11
Image 11

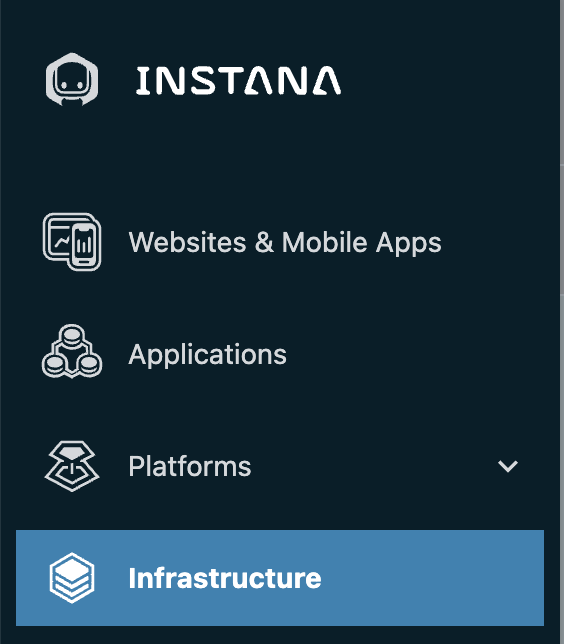
Next, Click Infrastructure as shown below in Image 12
Image 12
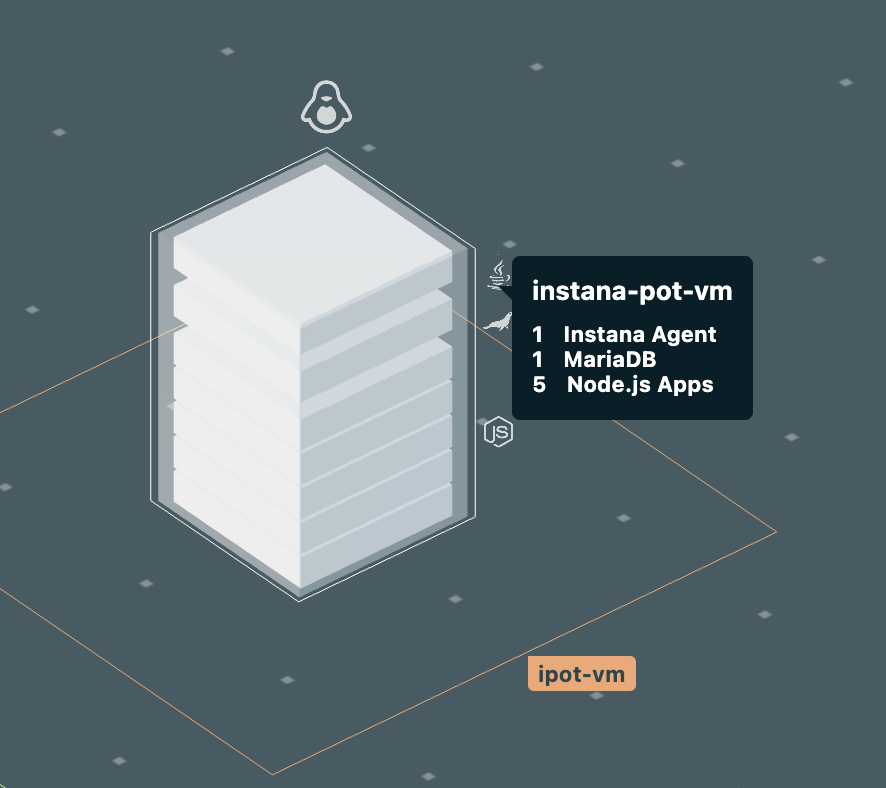
Next, verify you see the Linux server ipot-vm and click on the edge of the box when it say "instana-pot-vm" as shown below in Image 13
Image 13
Now click on "Open Dashboard" as shown below in Image 14
Image 14

You should be able to see the details of the linux server being monitored using Instana. Click on the "Live" button as shown below in Image 15
Image 15
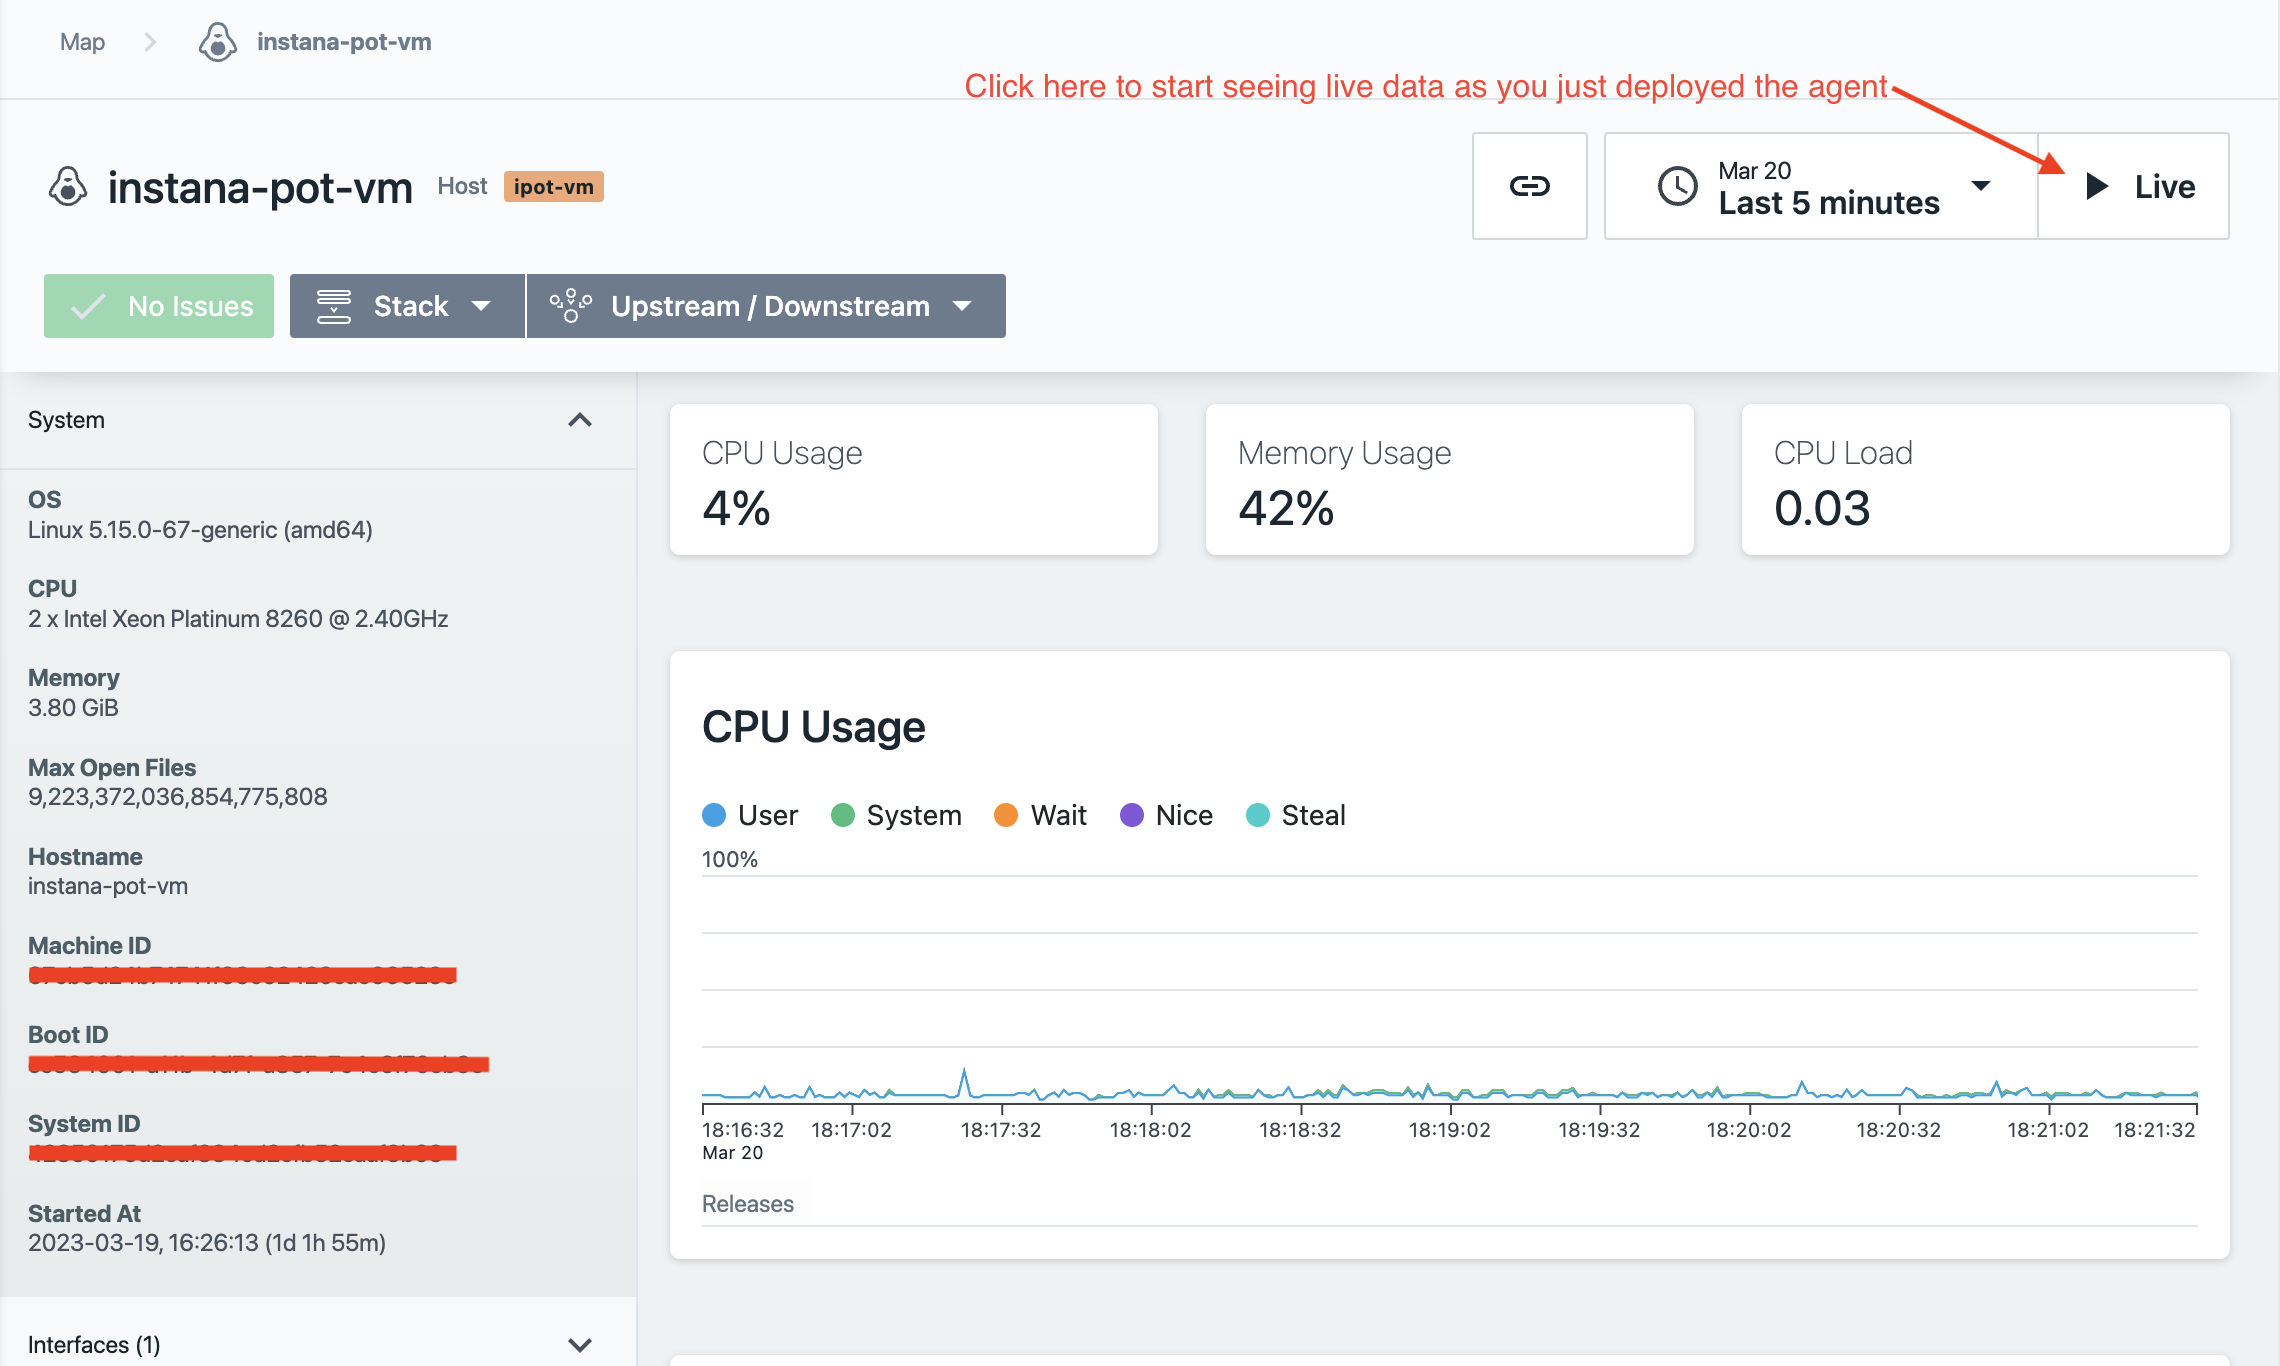
That's it you have now successfully installed the linux agent on the ipot-vm server.
Please don't forget to repeat the above steps for the itz-#####-ipot-mqace server
One of the things that needs to be done on the itz-#####-ipot-mqace (IP: 169.62.62.188) is to update the configuration.yaml file and put the value of 'ipot-mqace' in the availability-zone variable in that file as shown below
Next, open up a terminal window and login to the itz-#####-ipot-mqace as shown below(This is after you have installed the agent):
ssh -p <port_number> user_name@ip_address
ssh -p 2022 cocuser@169.62.62.188
Use the following credentials:
**user:** cocuser

**password:** "please refer to credentials.pdf" on the Instana server
Then use sudo to switch to root:
sudo -i
Install the agents using the same steps above and once done we need to edit the configuration.yaml and assign this VM to a Zone so it is grouped correctly in Instana:
cd /opt/instana/agent/etc/instana
vi configuration.yaml
In the configuraiton.yaml file, search for Zone and update the file as shown below in Image 16
Image 16
Save the file
Follow all the remaining steps from above to validate the itz-#####-ipot-mqace server shows up in Instana.
Next, let's move on to installing the Kubernetes agents.
2: Installing Instana Kubernetes Agent (s)
In this section, you will be installing the Instana Kubernetes Agent on the following 2 servers that have been provisioned for you for this lab.
Note: Do not install Kubernetes agent as "ROOT"
. IP: 169.62.62.185 **itz-######-ipot-rsmaster**
. IP: 169.62.62.174 **itz-######-ipot-qotdmaster**
Replace the ##### with the name from the environment that was provisioned for you as shown below in Image 17.
Image 17
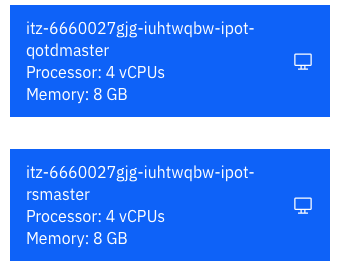
The steps below show the installation on the itz-#####-ipot-rsmaster server. (Repeat these steps on the itz-#####-ipot-qotdmaster server as well)
Open up a terminal window and login to the vm as shown below:
ssh -p 2022 cocuser@169.62.62.185
Use the following credentials:
**user:** cocuser

**password:** "please refer to credentials.pdf" on the Instana server
Switch to Instana UI, select the "Stan" the robot icon in the upper left corner as shown below in Image 18
Image 18
Next, click the "Deploy Agent" button near the upper right corner as shown below in Image 19
Image 19
A window will open with a list of different environments where you can install the Instana Agent.
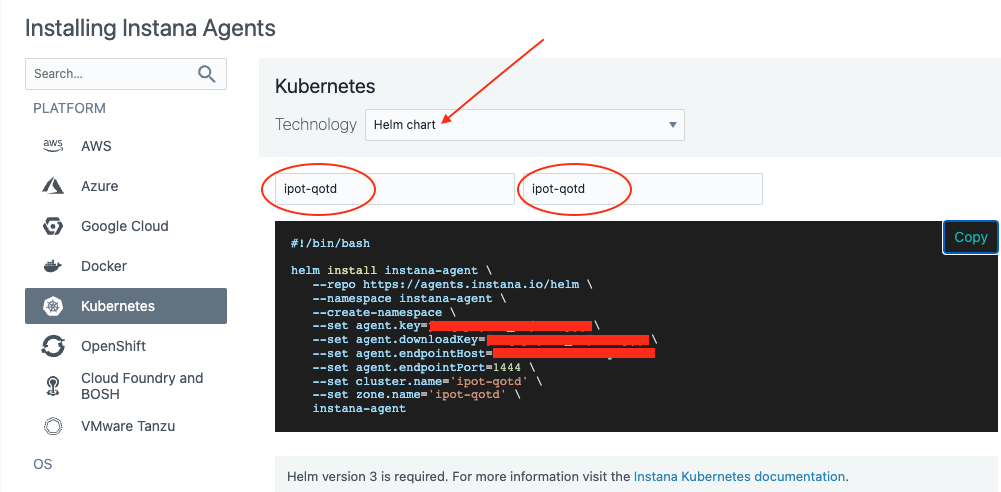
In this case, we will be installing the Kubernetes agent, so select Kubernetes on the left side of the screen and select the options in the order (1 to 5) as highlighted below in Image 20
Image 20
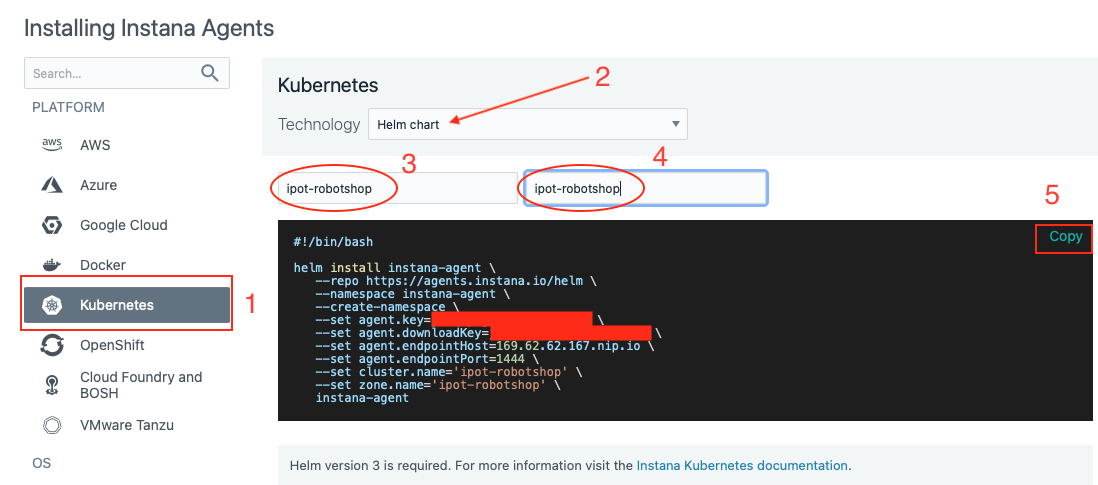
We will be using the helm chart option to install the agent. Please enter the value ipot-robotshop for "cluster" and "agent zone" fields as shown above
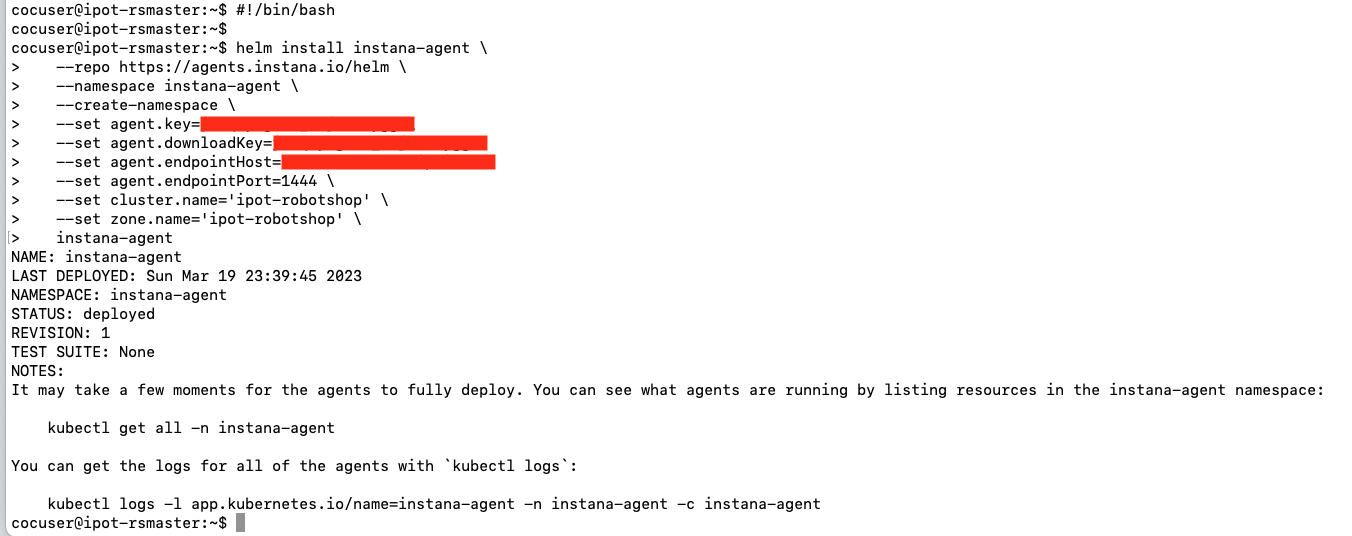
Next, copy and paste the curl command into the terminal window you had opened for the ipot-rsmaster (169.62.62.185) server.
The install will progress and you will see an output similar to Image 21 shown below.
Image 21
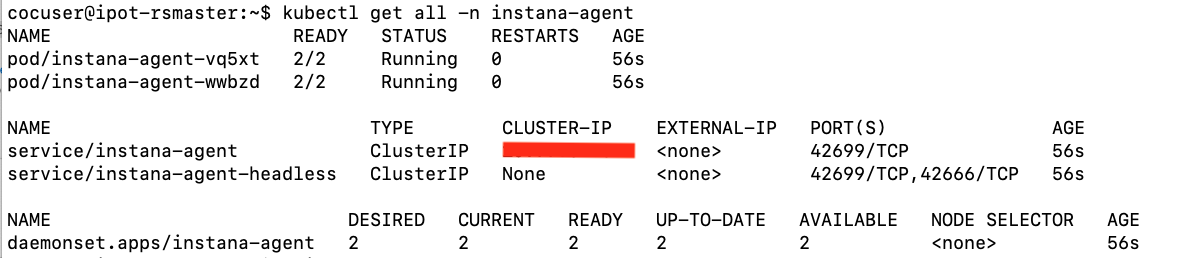
At this point the Agent is installed and up and running. You can verify by running the command below:
kubectl get all -n instana-agent
Image 22 shows the output you should expect to see if the agent is installed correctly.
Image 22
The Agent will automatically start monitoring and discovering key processes and middleware. In many cases it will automatically instrument those technologies.
Next, let's validate the agent is installed, Open a web browser and login to the Instana Server UI:
https://169.62.62.167.nip.io/#/home
Use the following credentials:
**E-Mail:** admin@instana.local

**Password:** "please refer to credentials.pdf" on the Instana server
In Instana UI, select the "Stan" the robot icon in the upper left corner as shown below in Image 23
Image 23
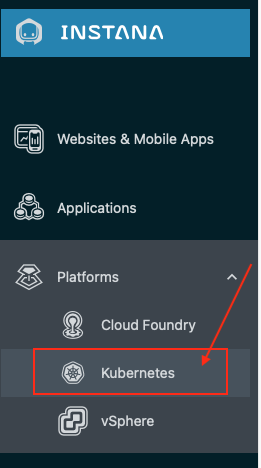
You can access and validate the agent has been installed successfully and is montioring the ipot-robotshop (cluster) by clicking Kubernetes on the left side of the screen as shown below in Image 24
Image 24
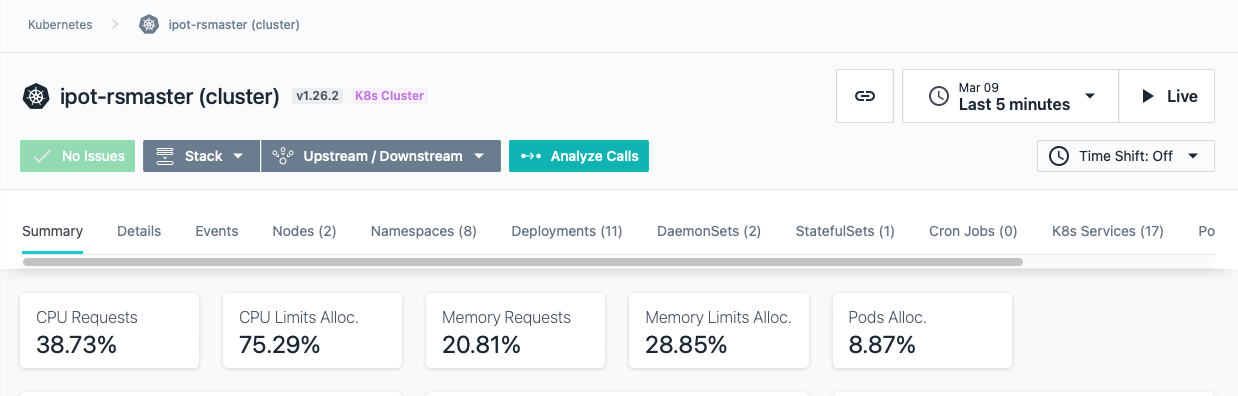
Next, review the metrics on the rsmaster cluster as shown below in Image 25
Image 25
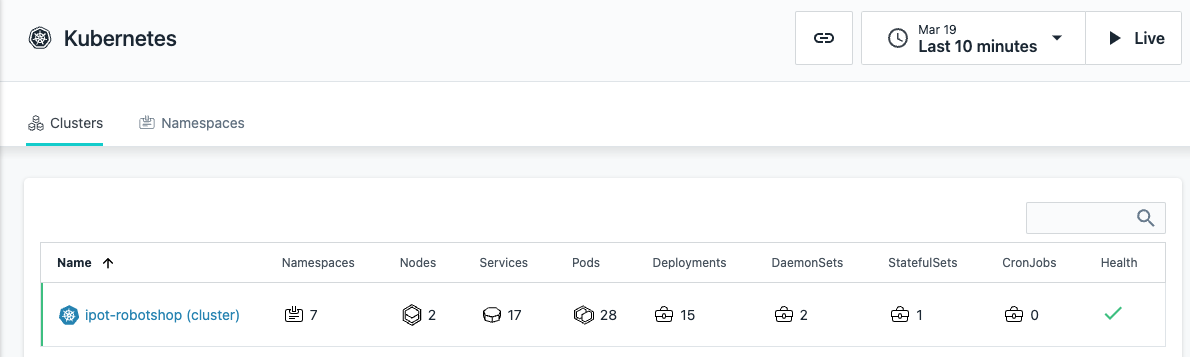
Next, click on the cluster name and it will show the details of the kubernetes cluster as shown below in Image 26
Image 26
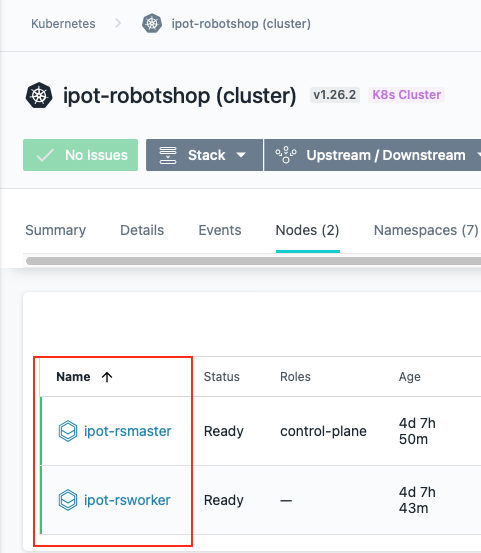
Next, click on the Nodes (2) tab and it will show the 2 nodes that make up this kubernetes cluster (master and worker) as shown below in Image 27
Image 27
That's it you have now successfully installed the kubernetes agent on the robotshop cluster.
The steps above show the installation on the itz-#####-ipot-rsmaster server.
Please don't forget to repeat the above steps for the itz-#####-ipot-qotdmaster server
One of the things that needs to be done on the itz-#####-ipot-qotdmaster (IP: 169.62.62.174) is to enter the value ipot-qotd for "cluster" and "agent zone" fields as shown below
Open up a terminal window and login to itz-#####-ipot-qotdmaster vm as shown below:
ssh -p 2022 cocuser@169.62.62.174
Use the following credentials:
**user:** cocuser

**password:** "please refer to credentials.pdf" on the Instana server
In this case, we will be installing the Kubernetes agent, so select Kubernetes on the left side of the screen and select the options in the order (1 to 5) as highlighted below in Image 28
Image 28
Run the above command on the command line and the agent should be installed as shown previously.
Next, let's move on to installing the Docker agent.
3: Installing Instana Docker Agent
In this section, you will be installing the Instana Docker Agent on 1 server that have been provisioned for you for this lab.
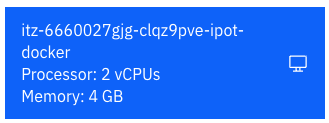
. IP: 169.62.62.187 **itz-######-ipot-docker**
Replace the ##### with the name from the environment that was provisioned for you as shown below in Image 29.
Image 29
The steps below show the installation on the itz-#####-ipot-docker server.
Open up a terminal window and login to the vm as shown below:
ssh -p 2022 cocuser@169.62.62.187
Use the following credentials:
**user:** cocuser

**password:** "please refer to credentials.pdf" on the Instana server
Switch to Instana UI, select the "Stan" the robot icon in the upper left corner as shown below in Image 30
Image 30
Next, click the "Deploy Agent" button near the upper right corner as shown below in Image 31
Image 31
A window will open with a list of different environments where you can install the Instana Agent.
In this case, we will be installing the Docker agent, so select Docker on the left side of the screen and select the options in the order (1 to 3) as highlighted below in Image 32
Image 32
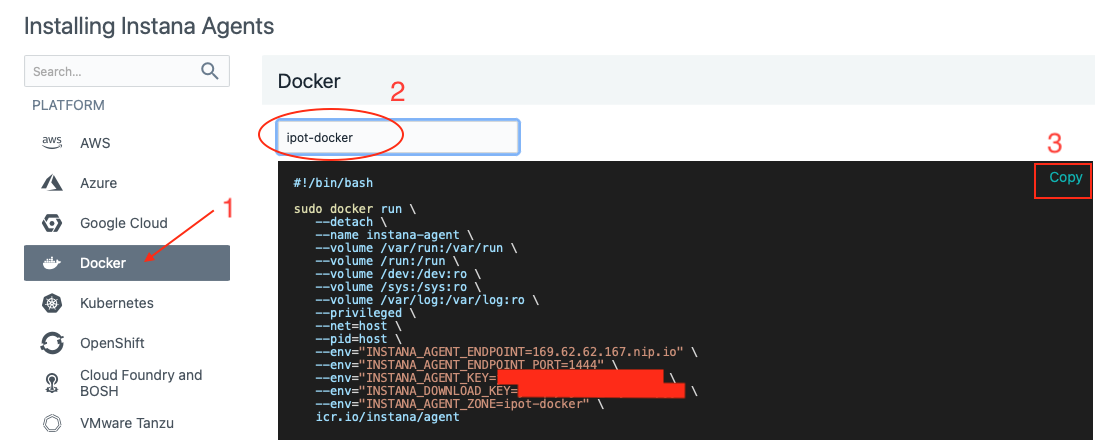
Please enter the value ipot-docker as shown above
Next, copy and paste the curl command into the terminal window you had opened for the ipot-docker (169.62.62.187) server.
The install will progress and you will see an output similar to Image 33 shown below.
Image 33
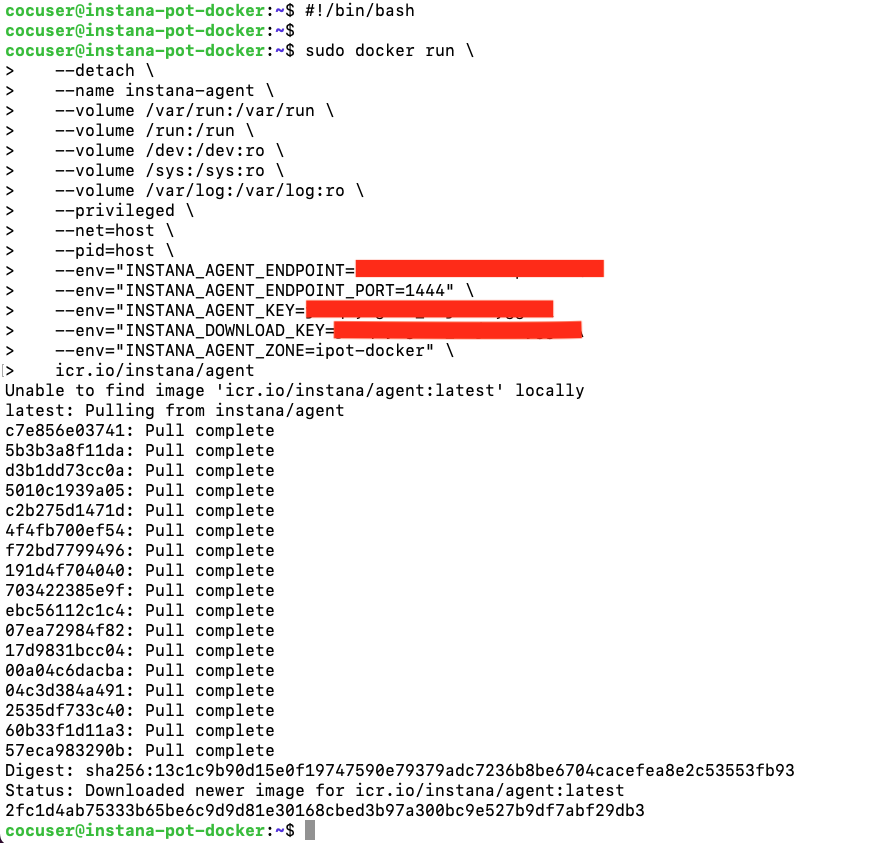
At this point the Agent is installed and up and running. The Agent will automatically start monitoring and discovering key processes and middleware. In many cases it will automatically instrument those technologies.
Next, let's validate the agent is installed, Open a web browser and login to the Instana Server UI:
https://169.62.62.167.nip.io/#/home
Use the following credentials:
**E-Mail:** admin@instana.local

**Password:** "please refer to credentials.pdf" on the Instana server
In Instana UI, select the "Stan" the robot icon in the upper left corner as shown below in Image 31
Image 34
Next, Click Infrastructure as shown below in Image 32
Image 34
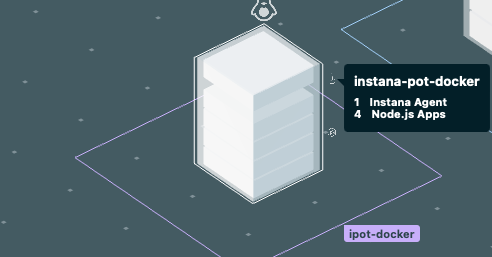
Next, verify you see the Docker server ipot-docker as shown below in Image 35
Image 35
Click on it and then click "Open Dashboard" and you should be able to see the details of the docker server being monitored using Instana as shown below in Image 36
Image 36
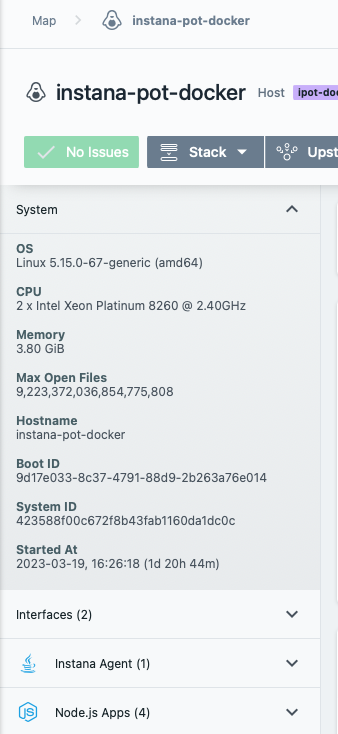
That's it you have now successfully installed the docker agent on the ipot-docker server.
Complete Infrastructure View of your entire environment
Once you are done with all the above instructions, you can reconfirm that you have 7 agents reporting into your instana server as shown below in Image 37 and Image 38
Image 37
Image 38
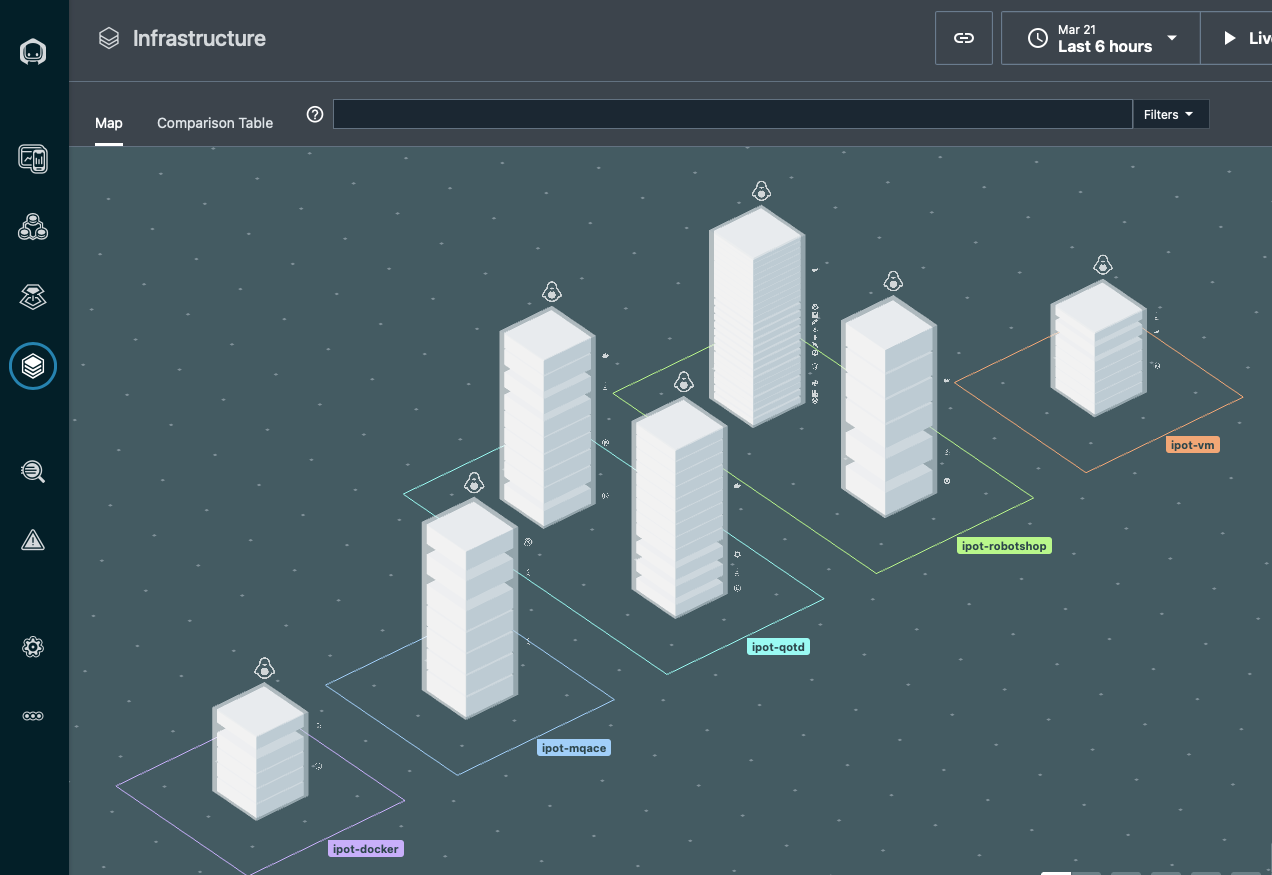
Finally, you should see a similar Infrastructure view of all the agents you have installed as shown below in Image 39
Image 39
Summary
Congratulations, you have completed this lab. In this lab, you learnt how to install 3 different types of agents: Linux VM, Kubernetes and Docker. You have seen how easy it is get things up and running and reporting back in Instana.
You also noticed how Instana collects data at 1-sec granularity when you click the "Live button" in the UI. This is a very powerful feature which can provide insights into how quickly your environment can change and you can review the changes in seconds.
If you are ready and don't need a break, please move forward to the next lab and "Explore Instana".